Conquer Excel Chaos: Obliterate Blank Rows Like a Pro
Ever opened a spreadsheet and felt overwhelmed by a sea of empty rows? Blank rows can clutter your data, making it difficult to analyze and navigate. Cleaning up these empty spaces is crucial for presenting professional spreadsheets and maximizing your efficiency. This article dives deep into the art of deleting blank rows in Excel, offering a comprehensive guide to help you conquer spreadsheet chaos.
Dealing with superfluous blank rows in spreadsheets is a common challenge for anyone working with Excel. Whether you've inherited a messy dataset or inadvertently created blank rows during data entry, knowing how to efficiently eliminate them is a valuable skill. It's like decluttering your digital workspace, allowing for a clearer view and improved workflow.
The need to remove blank rows isn't a new phenomenon. Since the early days of spreadsheet software, users have grappled with this issue. While the specific methods have evolved with each iteration of Excel, the core challenge remains the same: how to quickly and effectively eliminate unwanted empty rows without manually deleting each one individually.
The primary issue with multiple blank rows is that they disrupt data analysis and reporting. They can skew calculations, create inaccurate charts, and make it harder to identify trends. Moreover, large spreadsheets with numerous empty rows consume more memory and can slow down Excel's performance. Removing these unnecessary rows streamlines your data, improves accuracy, and enhances the overall user experience.
Deleting multiple blank rows in Excel can seem daunting, but it doesn't have to be. There are several straightforward methods to achieve this, ranging from using built-in Excel features to employing keyboard shortcuts. This article will walk you through each technique, providing clear explanations and examples.
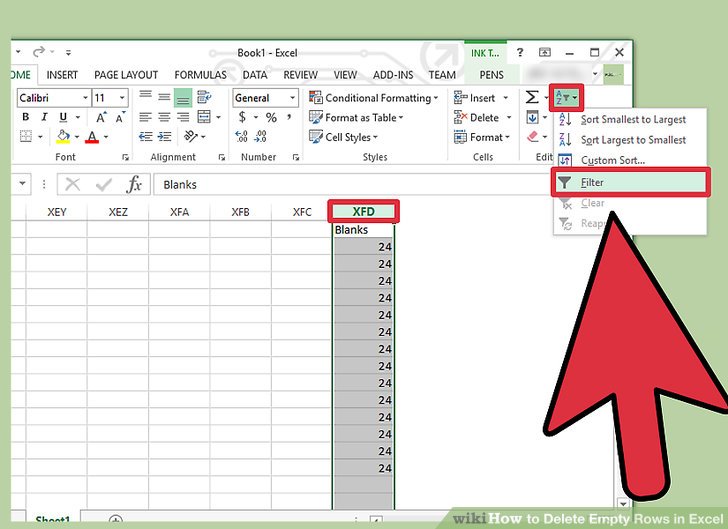
One of the easiest ways to delete blank rows is using the "Go To Special" function. Select the entire data range, press F5 to open the "Go To" dialog box, click "Special," choose "Blanks," and then delete the selected rows. Another efficient method is to sort your data based on a column that will group the blank rows together, making them easier to select and delete.
Benefits of Removing Blank Rows:
1. Improved Data Analysis: Clean data without empty rows leads to more accurate calculations and insightful analysis.
2. Enhanced Presentation: Removing blank rows creates a professional and organized spreadsheet, making it easier to understand and share.
3. Reduced File Size: Deleting unnecessary rows can significantly decrease file size, improving performance and reducing storage space.
Step-by-Step Guide:
1. Select the data range containing blank rows.
2. Press F5 to open the "Go To" dialog box.
3. Click "Special."
4. Choose "Blanks."
5. Click "OK."
6. Right-click on one of the selected blank rows.
7. Choose "Delete."
8. Select "Entire row."
9. Click "OK."
Advantages and Disadvantages
| Advantages | Disadvantages |
|---|---|
| Improved data analysis | Potential for accidental data deletion if not careful |
| Enhanced presentation | Can be time-consuming in extremely large datasets |
| Reduced file size | Requires some basic Excel knowledge |
Tips and Tricks:
Always save a copy of your original spreadsheet before deleting rows.
FAQs:
1. Q: Can I undo deleting rows? A: Yes, by pressing Ctrl+Z (or Cmd+Z on Mac).
2. Q: What if my data has hidden rows? A: Unhide them before deleting blank rows.
3. Q: Is there a keyboard shortcut? A: Yes, using Go To Special (F5) and then following the steps above is the fastest way.
4. Q: Can I delete blank rows in Google Sheets? A: Similar techniques can be used in Google Sheets.
5. Q: What if my blank rows aren't completely empty but contain formulas that return blank values? A: Adjust the Go To Special selection to include formulas returning blank values.
6. Q: What if I only want to delete blank rows within a specific range? A: Select that specific range before applying the method.
7. Q: Are there any add-ins that can help with this? A: Yes, several add-ins can automate the process of deleting blank rows.
8. Q: What if I accidentally delete data? A: Use the undo feature (Ctrl+Z or Cmd+Z) or restore from a previously saved version of your file.
In conclusion, mastering the art of deleting blank rows is a fundamental skill for any Excel user. It streamlines your data, improves accuracy, and enhances the overall presentation of your spreadsheets. By utilizing the methods described in this article, you can conquer spreadsheet chaos and boost your productivity. Clean, concise spreadsheets are not only easier to work with, but also project professionalism and attention to detail. Take control of your data and unlock the true potential of Excel by removing those pesky blank rows today.
Unlocking young minds the power of learning k 5 math worksheets
Unlocking the power of transparent logos the uv png revolution
The silent treatment why hes gone quiet what it means


